Your kitchen or bathroom cabinets have a fresh, beautiful new coat of paint. The room feels transformed, clean, and modern. Now comes the important part: keeping them looking that way. Proper cleaning and maintenance are essential to protect the finish and ensure your investment lasts for years. A professional paint job deserves professional-level care.
Discover everything you need to know about cleaning your newly painted cabinets. We’ll cover the right timeline, the best cleaning solutions, and the techniques to use so you can enjoy that “just-painted” look for a long, long time.
The Most Important Step: Patience is Key
Before you grab a sponge and cleaner, you need to understand paint curing. Fresh paint may feel dry to the touch within hours, but it takes much longer to fully cure, or harden, to its maximum durability.
- Drying Time: This is when the solvents in the paint evaporate, making it dry to the touch. This usually takes 24-48 hours. During this time, you can gently use your cabinets, but be extra careful.
- Curing Time: This is the chemical process where the paint hardens completely. For high-quality water-based and lacquer paints, like those we use at Blue Jay Painting, this process can take anywhere from 21 to 30 days.
Cleaning your cabinets before the paint has fully cured can cause smudges, scratches, or even peel the paint off. For the first month, avoid any scrubbing. If you notice a small spill, gently dab it with a soft, dry cloth.
Routine Cleaning for Painted Cabinets
 Once the paint is fully cured, you can begin a regular cleaning routine. For most kitchens, a light weekly or bi-weekly cleaning is enough to manage everyday grime, grease, and fingerprints.
Your Step-by-Step Guide to Gentle Cleaning
- Prepare Your Solution: Mix a few drops of gentle dish soap (like Dawn) into a gallon of warm water. This simple solution is effective for cutting through light grease without being harsh on the paint.
- Use a Soft Cloth: Dip a clean, soft microfiber cloth into the soapy water. Wring it out thoroughly until it is just damp, not dripping wet. Excess water can seep into joints and damage the cabinet material.
- Wipe Gently: Wipe down the cabinet doors, drawers, and frames using gentle, circular motions. Pay extra attention to areas around handles and knobs where fingerprints and oils accumulate.
- Rinse Lightly: Take a second microfiber cloth, dampen it with plain water, and wring it out completely. Wipe the cabinets again to remove any soap residue.
- Dry Completely: This is a critical step. Use a third, dry microfiber cloth to wipe away all moisture. Leaving water to air-dry can cause streaks and water spots, and over time, can compromise the paint finish.
Dealing with Tougher Stains and Grease
Sometimes, you’ll face more than just dust and fingerprints. Kitchen grease, food splatters, and other stubborn spots require a bit more effort, but you still need to be careful.
For built-up grease, you can create a slightly stronger cleaning solution:
- Mix a 50/50 solution of warm water and white vinegar.
- Apply with a soft cloth, focusing only on the stained area.
- Let the solution sit for a minute or two to break down the grease.
- Wipe clean with a damp cloth and then dry the surface completely.
Remember to always test any new cleaning solution on an inconspicuous spot first, like the inside of a cabinet door.
Cleaning Solutions: What to Use and What to Avoid
Choosing the right cleaner is the most important factor in preserving your cabinet finish. Using the wrong product can strip the paint or dull its sheen instantly. Here’s a quick comparison.
| Recommended Cleaners | Products to AVOID |
| Mild dish soap and warm water | Abrasive cleaners (Comet, Ajax) |
| 50/50 solution of white vinegar and water | Magic Erasers or other melamine foam sponges |
| Products specifically labeled “safe for painted wood” | Cleaners containing ammonia, bleach, or harsh solvents |
| Soft, non-scratch microfiber cloths | Steel wool, scouring pads, or stiff-bristled brushes |
| Citrus-based or oil-based cleaners | |
| All-purpose cleaners that aren’t pH-neutral |
Long-Term Paint Maintenance Tips
 Beyond cleaning, a few good habits can go a long way in protecting your cabinets.
- Tackle Spills Immediately: Wipe up splatters from cooking or spills as soon as they happen. The longer they sit, the harder they are to remove and the more likely they are to stain.
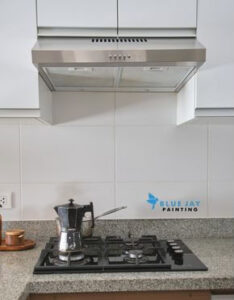
- Use Your Range Hood: Always turn on your exhaust fan when cooking. This helps pull airborne grease and moisture away from your cabinet surfaces.
- Be Mindful of Heat: Avoid placing heat-generating appliances like toasters, coffee makers, or air fryers directly under your upper cabinets. Constant exposure to heat and steam can cause the paint to peel or discolor over time.
Following these guidelines will ensure that the results of your professional cabinet painting project look fantastic for years. With just a little care, you can easily maintain that fresh, clean, and updated look.
Frequently Asked Questions (FAQ)
How long should I wait to clean my cabinets after they are painted?
You should wait about 30 days for the paint to fully cure before doing your first deep clean. During the first month, you can gently dust them or dab spills with a soft, dry cloth. Avoid any scrubbing or harsh chemicals.
What do I do if I get a stubborn grease stain on my newly painted cabinet?
For a stubborn grease stain on a fully cured cabinet, create a 50/50 mix of white vinegar and warm water. Apply it to the spot with a microfiber cloth and let it sit for a few minutes before gently wiping. Rinse with a damp cloth and dry completely. Never use abrasive sponges or harsh chemical degreasers.
Can I use a Magic Eraser on my painted cabinets?
No. Magic Erasers are made of melamine foam, which acts like an extremely fine-grit sandpaper. Using one on your painted cabinets will create micro-scratches that dull the finish and can even scrub the paint right off.
 Is professional painting worth it for kitchen cabinets?
Absolutely. While DIY is an option, a professional residential painting service ensures proper surface preparation, high-quality materials, and a flawless application for a durable, long-lasting finish that is much easier to clean and maintain. If you’re considering a project, be sure to ask for a free quote.
Recent Comments